[C++] 스터디 CPPALOM 3주차: 열혈 C++ 프로그래밍 Chap 5-6
(파워 포인트 파일(.pptx)을 Markdown으로 변환하여 업로드하였음)
# <br>C++ 스타일의 초기화
우리는 지금까지 다음과 같은 방식으로 초기화했다:
하지만 C++에서는 다음의 방식으로도 선언 및 초기화가 가능하다:
```C++
int num = 20;
int &ref = num;
```
```C++
int num(20);
int &ref(num);
```
다음 코드의 실행결과를 예상해보자:
sim2 객체에는 복사가 일어난다.
```C++
class SoSimple
{
private:
int num1;
int num2;
public:
SoSimple(int n1, int n2) : num1(n1), num2(n2) { }
void ShowSimpleData()
{
cout << num1 << endl;
cout << num2 << endl;
}
};
```
```C++
int main(void)
{
SoSimple sim1(15, 20);
SoSimple sim2 = sim1;
SoSimple sim3(sim2);
sim2.ShowSimpleData();
sim3.ShowSimpleData();
return 0;
}
```
# <br>복사 생성자
SoSimple형 객체를 인자로 받는다.
인자로 받은 SoSimple형 객체를 복사한다.
새로운 SoSimple형 객체를 생성한다.
이러한 복사 생성자를 선언하지 않을 시, 디폴트 복사 생성자가 생성된다.
```C++
SoSimple(SoSimple ©)
{
//...
}
```
복사 생성자를 직접 정의하는 것은 이와 같다:
```C++
#include <iostream>
using namespace std;
class SoSimple
{
private:
int num1;
int num2;
public:
SoSimple(int n1, int n2)
: num1(n1), num2(n2)
{
// empty
}
SoSimple(SoSimple ©)
: num1(copy.num1), num2(copy.num2)
{
cout<<"Called SoSimple(SoSimple ©)"<<endl;
}
void ShowSimpleData()
{
cout<<num1<<endl;
cout<<num2<<endl;
}
};
```
```C++
int main(void)
{
SoSimple sim1(15, 30);
cout<<"생성 및 초기화 직전"<<endl;
SoSimple sim2=sim1;
cout<<"생성 및 초기화 직후"<<endl;
sim2.ShowSimpleData();
return 0;
}
```
# <br>깊은 복사와 얕은 복사
* “called destructor!”가 단 한 번만 출력된다.
* name은 주소를 이용해서 참조하고 있기 때문이다.
* 복사가 이루어질 때, 문자열 자체의 복사가 아닌 문자열 주소의 복사가 이루어진다.
```C++
#include <iostream>
#include <cstring>
using namespace std;
class Person
{
char * name;
int age;
public:
Person(char * myname, int myage)
{
int len=strlen(myname)+1;
name=new char[len];
strcpy(name, myname);
age=myage;
}
void ShowPersonInfo() const
{
cout<<"이름: "<<name<<endl;
cout<<"나이: "<<age<<endl;
}
~Person()
{
delete []name;
cout<<"called destructor!"<<endl;
}
};
```
```C++
int main(void)
{
Person man1("Lee dong woo", 29);
Person man2=man1;
man1.ShowPersonInfo();
man2.ShowPersonInfo();
return 0;
}
```

```C++
이름: Lee dong woo
나이: 29
이름: Lee dong woo
나이: 29
called destructor!
```
# <br>복사 생성자의 호출
* 복사 생성자가 호출되는 시점은 크게 세 가지로 구분할 수 있다:
* 첫째, 기존에 생성된 객체를 이용해서 새로운 객체를 초기화하는 경우
* 둘째, 함수 호출에서 참조형이 아닌 인자로 객체를 전달하는 경우
* 셋째, 함수 반환에서 참조형이 아닌 객체를 반환하는 경우
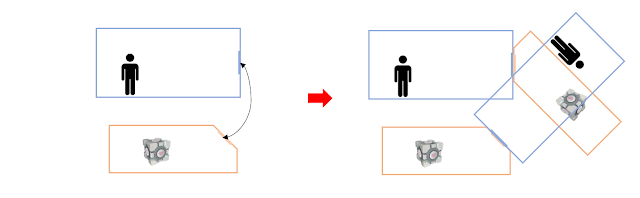
함수에 인자를 전달하는 과정에서 복사 생성자가 호출된다.
복사 생성자의 호출은 당연히, 함수의 인자인 ob 객체의 복사 생성자가 호출된다.
```C++
#include <iostream>
using namespace std;
class SoSimple
{
private:
int num;
public:
SoSimple(int n) : num(n)
{ }
SoSimple(const SoSimple& copy) : num(copy.num)
{
cout<<"Called SoSimple(const SoSimple& copy)"<<endl;
}
void ShowData()
{
cout<<"num: "<<num<<endl;
}
};
void SimpleFuncObj(SoSimple ob)
{
ob.ShowData();
}
```
```C++
int main(void)
{
SoSimple obj(7);
cout<<"함수 호출 전"<<endl;
SimpleFuncObj(obj);
cout<<"함수 호출 후"<<endl;
return 0;
}
```
```C++
함수 호출 전
Called SoSimple(const SoSimple& copy)
num: 7
함수 호출 후
```
# <br>임시 객체의 생성
```C++
int main(void)
{
Temporary(100);
cout<<"********** after make!"<<endl<<endl;
Temporary(200).ShowTempInfo();
cout<<"********** after make!"<<endl<<endl;
const Temporary &ref=Temporary(300);
cout<<"********** end of main!"<<endl<<endl;
return 0;
}
```
```C++
#include <iostream>
using namespace std;
class Temporary
{
private:
int num;
public:
Temporary(int n) : num(n)
{
cout<<"create obj: "<<num<<endl;
}
~Temporary()
{
cout<<"destroy obj: "<<num<<endl;
}
void ShowTempInfo()
{
cout<<"My num is "<<num<<endl;
}
};
```
```C++
create obj: 100
destroy obj: 100
********** after make!
create obj: 200
My num is 200
destroy obj: 200
********** after make!
create obj: 300
********** end of main!
destroy obj: 300
```
# <br>객체의 생성과 소멸
* tempRef 객체를 생성하는 과정에서:
* 함수에서 반환된 객체의 주소를 그대로 갖는 것을 알 수 있다.
* 내부에서 이루어지는 최적화를 확인할 수 있다.
```C++
int main(void)
{
SoSimple obj(7);
SimpleFuncObj(obj);
cout<<endl;
SoSimple tempRef=SimpleFuncObj(obj);
cout<<"Return Obj "<<&tempRef<<endl;
return 0;
}
```
```C++
#include <iostream>
using namespace std;
class SoSimple
{
private:
int num;
public:
SoSimple(int n) : num(n)
{
cout<<"New Object: "<<this<<endl;
}
SoSimple(const SoSimple& copy) : num(copy.num)
{
cout<<"New Copy obj: "<<this<<endl;
}
~SoSimple()
{
cout<<"Destroy obj: "<<this<<endl;
}
};
SoSimple SimpleFuncObj(SoSimple ob)
{
cout<<"Parm ADR: "<<&ob<<endl;
return ob;
}
```
```C++
New Object: 0012FF54
New Copy obj: 0012FE38
Parm ADR: 0012FE38
New Copy obj: 0012FE64
Destroy obj: 0012FE38
Destroy obj: 0012FE64
New Copy obj: 0012FE38
Parm ADR: 0012FE38
New Copy obj: 0012FF48
Destroy obj: 0012FE38
Return Obj: 0012FF48
Destroy obj: 0012FF48
Destroy obj: 0012FF54
```
# <br>const 객체
* 객체 역시 const 키워드를 이용해서 상수화할 수 있다.
* 주의: 이는 다른 언어에서 흔히 다루어지듯이 참조를 변경하지 않겠다는 의미가 아님!
* 객체의 데이터 변경을 허용하지 않겠다는 의미이며, const 키워드를 가진 함수만 호출할 수 있다.
* 객체를 변경하지 않는 함수는 const 키워드를 붙일 수 있다.
* 즉, immutable한 객체를 선언할 수 있다!
```C++
#include <iostream>
using namespace std;
class SoSimple
{
private:
int num;
public:
SoSimple(int n) : num(n)
{ }
SoSimple& AddNum(int n)
{
num+=n;
return *this;
}
void ShowData() const
{
cout<<"num: "<<num<<endl;
}
};
```
```C++
int main(void)
{
const SoSimple obj(7);
// obj.AddNum(20);
obj.ShowData();
return 0;
}
```
# <br>cosnt와 함수 오버로딩
const 역시 함수의 signature에 포함되며, 오버로딩 가능하다.
```C++
#include <iostream>
using namespace std;
class SoSimple
{
private:
int num;
public:
SoSimple(int n) : num(n)
{ }
SoSimple& AddNum(int n)
{
num+=n;
return *this;
}
void SimpleFunc ()
{
cout<<"SimpleFunc: "<<num<<endl;
}
void SimpleFunc () const
{
cout<<"const SimpleFunc: "<<num<<endl;
}
};
void YourFunc(const SoSimple &obj)
{
obj.SimpleFunc();
}
```
```C++
int main(void)
{
SoSimple obj1(2);
const SoSimple obj2(7);
obj1.SimpleFunc();
obj2.SimpleFunc();
YourFunc(obj1);
YourFunc(obj2);
return 0;
}
```
```C++
SimpleFunc: 2
const SimpleFunc: 7
const SimpleFunc: 2
const SimpleFunc: 7
```
# <br>friend
* A 클래스가 B 클래스를 대상으로 friend 선언을 하면:
* B 클래스는 A 클래스의 private 멤버에 직접 접근할 수 있다.
* A 클래스는 여전히 B 클래스의 private 멤버에 직접 접근할 수 없다.
* friend 선언은 객체의 정보은닉을 무너뜨린다.
* friend 선언은 지나치면 아주 위험할 수 있다.
* friend 선언은 필요한 상황에서 극히 소극적으로 사용해야 한다.
Girl 클래스와 Boy 클래스는 서로가 friend이므로, 서로의 private 멤버에 접근할 수 있다.
특정한 함수가 해당 클래스의 멤버에 접근할 수 있도록 선언할 수도 있다.
```C++
#include <iostream>
#include <cstring>
using namespace std;
class Girl;
class Boy
{
private:
int height;
friend class Girl;
public:
Boy(int len) : height(len)
{ }
void ShowYourFriendInfo(Girl &frn);
};
class Girl
{
private:
char phNum[20];
public:
Girl(char * num)
{
strcpy(phNum, num);
}
void ShowYourFriendInfo(Boy &frn);
friend class Boy;
};
```
```C++
void Boy::ShowYourFriendInfo(Girl &frn)
{
cout<<"Her phone number: "<<frn.phNum<<endl;
}
void Girl::ShowYourFriendInfo(Boy &frn)
{
cout<<"His height: "<<frn.height<<endl;
}
int main(void)
{
Boy boy(170);
Girl girl("010-1234-5678");
boy.ShowYourFriendInfo(girl);
girl.ShowYourFriendInfo(boy);
return 0;
}
```
```C++
Her phone number: 010-1234-5678
His height: 170
```
# <br>static
* class의 scope을 지니는 변수가 필요한 상황
* simObjCnt는 SoSimple을 위한 전역변수이다.
* cmxObjCnt는 SoComplex를 위한 전역변수이다.
* 이러한 상황을 static 키워드로 해결할 수 있다.
```C++
#include <iostream>
using namespace std;
int simObjCnt=0;
int cmxObjCnt=0;
class SoSimple
{
public:
SoSimple()
{
simObjCnt++;
cout<<simObjCnt<<"번째 SoSimple 객체"<<endl;
}
};
class SoComplex
{
public:
SoComplex()
{
cmxObjCnt++;
cout<<cmxObjCnt<<"번째 SoSimple 객체"<<endl;
}
SoComplex(SoComplex ©)
{
cmxObjCnt++;
cout<<cmxObjCnt<<"번째 SoSimple 객체"<<endl;
}
};
```
```C++
int main(void)
{
SoSimple sim1;
SoSimple sim2;
SoComplex com1;
SoComplex com2=com1;
SoComplex();
return 0;
}
```
```C++
1번째 SoSimple 객체
2번째 SoSimple 객체
1번째 SoComplex 객체
2번째 SoComplex 객체
3번째 SoComplex 객체
```
static 키워드를 붙여 변수를 선언하면, 이는 class scope을 지닌다.
이는 접근제한을 적용할 수 있으므로, 좀 더 안전하다.
```C++
class SoSimple
{
private:
static int simObjCnt;
public:
SoSimple()
{
simObjCnt++;
cout<<simObjCnt<<"번째 SoSimple 객체"<<endl;
}
};
int SoSimple::simObjCnt=0;
class SoComplex
{
private:
static int cmxObjCnt;
public:
SoComplex()
{
cmxObjCnt++;
cout<<cmxObjCnt<<"번째 SoComplex 객체"<<endl;
}
SoComplex(SoComplex ©)
{
cmxObjCnt++;
cout<<cmxObjCnt<<"번째 SoComplex 객체"<<endl;
}
};
int SoComplex::cmxObjCnt=0;
```
```C++
int main(void)
{
SoSimple sim1;
SoSimple sim2;
SoComplex cmx1;
SoComplex cmx2=cmx1;
SoComplex();
return 0;
}
```
```C++
1번째 SoSimple 객체
2번째 SoSimple 객체
1번째 SoComplex 객체
2번째 SoComplex 객체
3번째 SoComplex 객체
```
# <br>static 멤버
* 범위 확인 연산자(::)을 이용해서 static 멤버에 접근할 수 있다.
* 이는 class scope이므로, 객체가 생성되지 않아도 접근할 수 있다.
* static 멤버 함수도 선언할 수 있다.
* static 멤버 함수 내에서는 static 멤버 변수와 static 멤버 함수만 호출이 가능하다.
* 객체의 상태는 필요 없지만 클래스와 연관된 연산들을 static으로 선언하는 것이 좋다.
```C++
#include <iostream>
using namespace std;
class SoSimple
{
public:
static int simObjCnt;
public:
SoSimple()
{
simObjCnt++;
}
};
int SoSimple::simObjCnt=0;
```
```C++
int main(void)
{
cout<<SoSimple::simObjCnt<<"번째 SoSimple 객체"<<endl;
SoSimple sim1;
SoSimple sim2;
cout<<SoSimple::simObjCnt<<"번째 SoSimple 객체"<<endl;
cout<<sim1.simObjCnt<<"번째 SoSimple 객체"<<endl;
cout<<sim2.simObjCnt<<"번째 SoSimple 객체"<<endl;
return 0;
}
```
# <br>const static 멤버
```C++
#include <iostream>
using namespace std;
class CountryArea
{
public:
const static int RUSSIA =1707540;
const static int CANADA =998467;
const static int CHINA =957290;
const static int SOUTH_KOREA =9922;
};
int main(void)
{
cout<<"러시아 면적: "<<CountryArea::RUSSIA<<"km^2"<<endl;
cout<<"캐나다 면적: "<<CountryArea::CANADA<<"km^2"<<endl;
cout<<"중국 면적: "<<CountryArea::CHINA<<"km^2"<<endl;
cout<<"한국 면적: "<<CountryArea::SOUTH_KOREA<<"km^2"<<endl;
return 0;
}
```
클래스에서 필요한 상수를 초기화하기 위해 const static 멤버를 활용할 수 있다.


댓글
댓글 쓰기